How to Make Clay -
Homemade Clay Recipes
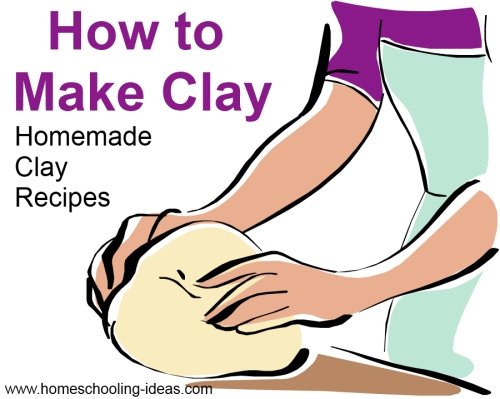
Homemade clay recipes are perfect for modeling clay projects or other clay crafts. And making clay and play dough is easy and fun!
There are lots of different recipes you can try. Do you want something quick and easy? Or would you prefer to bake your finished model for a more permanent effect?
I have picked 5 recipes to suit your different requirements - and added some reader recommended recipes too. All of the recipes and tried and tested - but results vary a lot depending on the flour you use, how you weigh the measurements, and humidity. So be sure to read my instructions first.
Why not get your kids to help you make up the recipes?
Be sure to read my tips on how to make clay too and you will be making great playdough in no time at all!
Homemade Modeling Clay Recipes
Here are my top 5 clay recipes for you to try. These are perfect for your homeschooling crafts. Click on a link below, or scroll down for recipes.

For Kids |
Would you like a printable version? Grab my recipes and making tips as printable clay recipes!
Were you wanting to make real clay from mud?
Try these instructions for using natural clay
How to Make Clay and Playdough :
Modelling clay can be made from a number of ingredients (see Wikipedia) but at home it is usually made from flour and water. Oil or cream of tartar is added to help with elasticity - and salt is usually used to help preserve the clay (and stop it going moldy).If you are new to making playdough, then there is a little more to it than just throwing all the ingredients into a bowl and mixing!
Here are some tips on how to make clay that will help you get the best results.
- We all have slightly different ways of measuring things, different flours absorb at different rates, and even things like humidity can effect your recipe. So use the ingredients as a place to start rather than expecting things to be exact. Measure out your ingredients carefully - then slowly add the liquid to the dry ingredients. Keep mixing and then adding a little more liquid until you get a nice firm clay. If the results are too sticky, add more flour. To flakey and dry? Add a little more water.
- Most of the recipes call for all purpose or plain flour but I have had good results with bread flour. I think bread flour has a higher gluten content which helps to make the dough hold together well. You may need to adjust the water quantities if you use bread flour.
- If you want colored clay you can add food coloring or tempera paint. If you are happy for all the dough to be the same color then just add the coloring to the water before you mix the ingredients. If you would like different colored batches then make up the dough first, divide into portions and knead in the colors separately. This will give you more of a marbled effect effect at first, but the color will spread as you keep kneading it in.
- Store in an airtight container and keep in a cool place. It should keep for a couple of months but homemade clay doesn't have the preservatives of shop bought stuff. If mold develops - it's time for a new batch!
- Feel free to experiment and develop your own recipes. Try different oil or flour. The cream of tartar in the recipes is optional, but it does help with the elasticity. You can find in the the store with the baking ingredients (usually with the baking powder and bicarb).
Recipes
Air Hardening Modeling Clay
- 2 cups baking soda
1 cup cornstarch (cornflour)
1.5 cups cold water
(makes about 2 pounds - the recipe can be halved).
Baking soda and cornstarch make a smooth, pliable play clay that can be colored with everyday food coloring - or left white and painted once it hardens. When you have made your model, leave it to air dry - turning every 12 hours or so.
Place ingredients in a pan and stir until smooth. Set the pan over a medium heat and stir until boiling. Stir out any lumps and cook until it is the consistency of mashed potatoes.
Turn out onto a plate and cover with a damp, well-wrung kitchen towel - let cool. Dust a work surface with cornstarch and knead until pliable.
Baking Clay

|
- 4 cups plain/all-purpose flour
1 cup salt
1 teaspoon powdered alum (optional)
1.5 cups water
Mix ingredients in a bowl.
This clay bakes best if the ornaments are not too thick - about 1/2 inch is best.
Bake your ornaments on an ungreased baking tray for 30 mins, then turn and bake them for another 90 minutes until they are hard and dry (keep an eye on them so they don't burn). You need a low oven temperature - about 250 degrees F or 120 degrees C. When they are cool you can smooth them with fine sandpaper before decorating and varnishing.
Playdough Recipes
Emily's Fantastic No Cook Playdough Recipe
This one was doing the rounds when my children were toddlers. Not sure who Emily is - but her recipe is great!- 2 cups of plain/all-purpose flour
1 cup salt
1 cup cold water
1 tbspn oil (vegetable oil is fine - baby oil smells lovely).
Drop the ingredients into a plastic bag and seal. Let the children knead them together inside the bag - then tip it out for modeling fun.
Kool Aid Playdough

for an animation. |
- 2 ½ cups of plain/all-purpose flour
½ cup salt
1 Tbsp. cream of tartar
2 pkgs of unsweetened Kool-Aid
Just measure everything into a bowl and mix together.
Homemade Playdough
This is a cooked recipe. I find I get better results with this one, but it takes a bit longer.2 cups plain/all-purpose flour
1 cup salt
2 tablespoons cooking oil
2 teaspoons cream of tartar
2 cups of water
Put all dry ingredients in a saucepan. Add water, oil and color. cook slowly and stir all the time. As it gets hot it will begin to thicken up. Knead on a floured surface.
Alternatively, microwave on high for up to 6 minutes. Remove frequently and stir. Knead on a floured surface.
Now you know how to make clay, I hope you have as much fun in your homeschooling crafts with these recipes as we do.

Read what other visitors have said.
Click below to see other visitors homemade clay recipes.
Chocolate Playdough 


This is the recipe that we use for chocolate playdough. It is very quick and easy.
It sometimes gets a bit sticky, so I add extra powdered sugar.
…
Make Clay or Non ClayDoh 


You Need :
Elmers LIQUID GLUE (White PVA Glue)
Any color paint or melted crayons
Mix together the glue, paint or melted crayons.
Put in freezer. …
Hailey's Silly Putty 


Hailey's Recipe for Silly Putty
2tsp Borax (found in the laundry section)
White glue
1 cup water
You would use the glue for how much flubber you …
Homemade Clay 


This recipe was sent to me by Andrew in Australia as an oven bake clay.
It got some bad comments (see below), so I made a batch myself. I actually …
Joyces no-mess way to make clay 


Recipe :
3 cups of flour
1 cup salt
1 cup oil 1/2 cup oil
1 cup water
Put the ingredients in a plastic bag and seal. Then you can …
Claydo Recipe - Air Hardening Clay 


This is the air hardening clay recipe we use.
Pour 2 cups of all purpose flour
pour 1 cup of salt
pour 1/4 cup of cornstarch
pour 1/4 cup …
Simple and Easy Play Dough 


Here is a great recipe, very easy and versatile : simply add food coloring and glitter to spark it up !
4 cups of flour
1 cup of salt
4 cups of water …

Need some clay project ideas?
Now you know how to make clay, try these Easy Clay Projects For Kids.
Wondering about firing clay?
Here is my advice on how to fire pottery without a kiln.
Homeschooling-Ideas › Kids Craft Ideas › How to Make Clay
Lovely messages sent from visitors like you:
Oh my goodness! I am a home schooling mum of 4 and I have NEVER found a better site! Thank you so much.
Blessings, Jenny (New Zealand)
I wanted to say THANK YOU for your fabulous website. I found your website, and finally I have the confidence to take the plunge and take my daughter out of school and educate her at home, thank you, thank you.
Marina (UK)
I cannot get over how much great information and super ideas you have here. Fantastic!
Ruralmama (USA)
This is simply fabulous!! I just now found this site and I'm so excited!! The opportunities and suggestions as well as the need to inspire are exactly what I have been searching to fulfill!! I'm so thrilled to get started and even more excited to continue to explore all of the fabulous suggestions and creative ideas you have offered here!!! Thank you, thank you, thank you!
Jennifer (USA)


